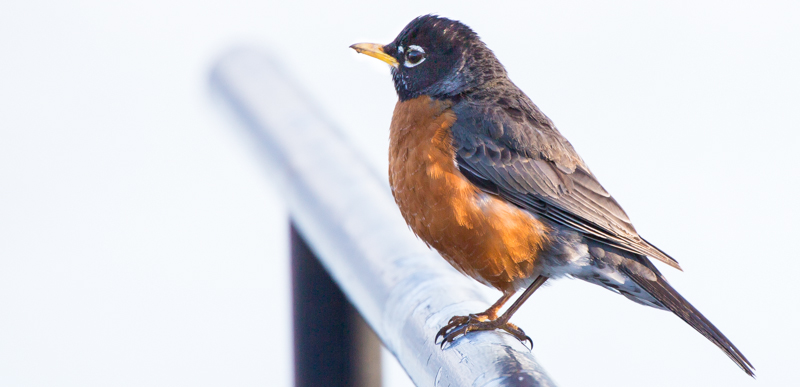
Correctly Lit Subject with Bright Background.
“Uncle Stuart, please tell me a bedtime story about exposure compensation, camera sensors and describe my remote control flash-exposure compensation options when working multiple speed-lights?”
“Hold on Sally, just one at a time! It seems like just last week you were looking the wrong way through your viewfinder and now you’re asking about exposure compensation! Next week, you’ll probably be inquiring about the nuances of AI Servo 2nd image tracking, speed vs focus priorities!” “Well, where to start… To quote Frank Sinatra, Exposure regrets, I’ve had a few.”
“What do you mean, Uncle Stuart?”
“I mean that we’ve all missed some great shots because we weren’t thinking about how our cameras figure exposure.”
“You see Sally, our modern DSLR cameras are amazing! They automatically adjust shutter speed, ISO and aperture to achieve what it estimates to be the correct exposure. The problem is, our camera doesn’t know what we are taking a photo of! More specifically, it don’t know what the subject is. Our photo’s subject is the most important part of our photo, right? Therefor, we want it exposed correctly. Here is an example… When we take a portrait of someone who is back-lit by the sun, their face will be dark and underexposed. This is because the camera calculates what it sees as correct exposure by averaging all the light in the photo and then shifts the photo’s overall brightness to an equivalent of 18% grey. This camera sees a very bright background and darkens the entire photo accordingly, leaving our subject in the dark.”
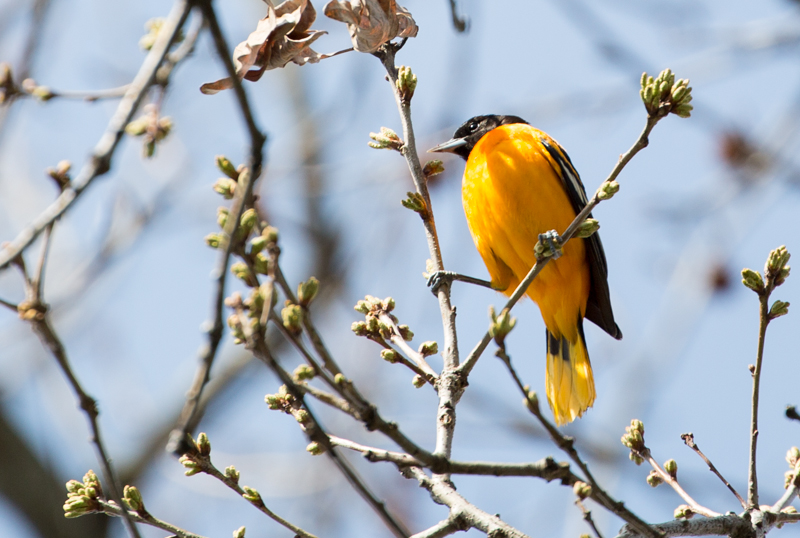
Exposure Compensation set for Correct Exposure
“I don’t understand…”
“Sally, try this. First turn off your flash, then get a white piece of paper and take a photo of it, making sure the paper fills the shot. See how the resulting photo doesn’t look bright like the paper looks? It’s a little dark, right? As I said earlier, the camera is trying to make it 18% grey. Now take the paper into a lighter environment and take the photo again. See, you get the same result, a dark looking photo. The camera doesn’t know you are trying to take a photo of a white piece of paper. It simply sees the white paper and adjusts the exposure darker because it thinks the scene is too bright.”
“So, Uncle Stuart, you’re are saying that the paper is our subject and we know it should look bright but the camera doesn’t?”
“Exactly, Sally! If we want the paper to look bright like it should, we need to manually adjust our exposure compensation brighter! The same thing happens when we take back-lit portraits or pictures of birds flying in the bright sky. The camera will unintentionally make our subjects too dark. We need to use the exposure compensation setting to get things looking right when the photo is taken.”

Camera’s Bad Attempt at Correct Exposure – As Shot
“Uncle Stuart, why not just increase brightness in post-production?”
“Well Sally, if the camera doesn’t capture the digital details in the original photo because the photos are too dark, then those details won’t be there to brighten up in Lightroom or Photoshop. The same thing happens with overexposed details. If they aren’t captured by the camera, we cannot bring out the detail later.
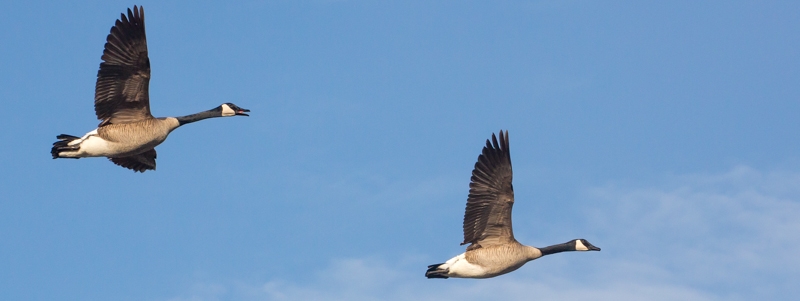
Correctly Exposed Geese with Bright Background
“Uncle Stuart… So, the opposite would be true at night, right? If we’re taking a night photo, we’ll want to tell the camera to darken things?
“Gosh Sally, you’re a quick learner! You’re correct! For night photos we want the scene darker, so we need to set our cameras accordingly. Always remember that your camera doesn’t know what your subject is and so you may need to adjust our camera manually to get the results we want.”
“Thank you Uncle Stuart!”
“You are very welcome Sally. Good night and sleep tight. I hope your dreams are happy, restful and properly exposed.”